Want to streamline your financial processes in QuickBooks Online? Learn how to efficiently write and print checks with ease. Mastering this essential skill will help you manage your business transactions seamlessly and save time. Stay ahead by mastering the art of writing and printing checks directly from QuickBooks Online, simplifying your accounting tasks. Discover the step-by-step guide to enhance your financial management effortlessly.
Create and Record Checks
Voucher Checks
Voucher checks are essential for tracking transactions accurately in QuickBooks Online. To create one, navigate to the “New” button and select “Check.” Input the payee, date, and amount details.
To record the check, ensure to fill out the memo field with relevant information about the transaction. This aids in keeping track of expenses and simplifies reconciliation processes.
Void Checks
In case a check needs to be canceled, QuickBooks Online allows you to void it without deleting the record entirely. Simply locate the check in the system and select the option to void it.
When recording checks, always verify that the amount matches the actual payment made. This step is crucial for accurate bookkeeping and financial reporting.
Check Transactions
Each check transaction should be categorized correctly within QuickBooks Online to ensure proper accounting. Assign the transaction to the appropriate account to maintain accurate financial records.
Remember to review and reconcile your check transactions periodically to identify any discrepancies or errors promptly.
Set Up QuickBooks for Printing Checks
Customize Check Layout
To set up QuickBooks for printing checks, start by customizing the check layout according to your preferences. Access the settings in QuickBooks and adjust the layout to include necessary details.
When customizing the check layout, ensure that essential information such as company name, address, and logo are correctly placed. This step is crucial for creating a professional and organized appearance on your printed checks.
Link Bank Account
After customizing the check layout, proceed to link your bank account with QuickBooks. By linking your bank account, you enable QuickBooks to accurately track your financial transactions and synchronize them with your bank records.
Ensure that the bank account details entered in QuickBooks match the actual account information. This step is vital for seamless integration between QuickBooks and your bank for accurate check printing.
Verify Check Printing Settings
Before printing checks in QuickBooks, verify the check printing settings to avoid any errors or misprints. Double-check the alignment of the check details on the layout to ensure they match correctly with your pre-printed check stock.
Review and confirm the printer settings in QuickBooks to guarantee that the checks will be printed accurately. This verification process is essential to prevent any discrepancies in the printed checks.
Add Checks to Print Queue
Print Checks
To add checks to the print queue in QuickBooks Online, first, navigate to the “Create ⨁” icon and select “Print Checks.” Then, choose the bank account from which you want to print checks.
Next, select the type of checks you are using, whether standard or voucher. Enter the starting check number and the date range for the checks you want to print.
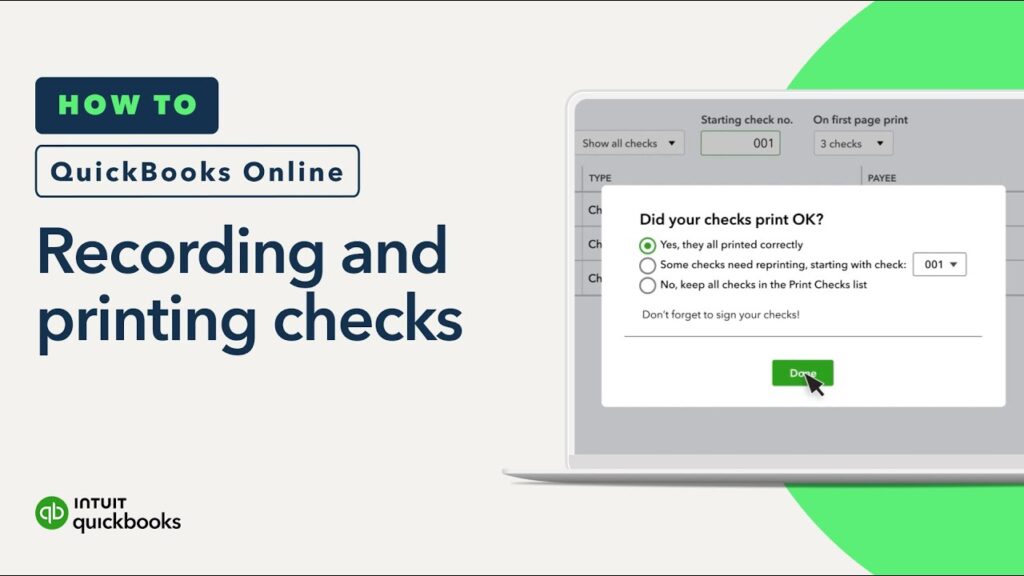
After selecting the checks you wish to print, click on “Preview and Print” to review them before sending them to the printer. Once you’ve confirmed everything looks correct, proceed by clicking on “Print.”
Verify Check Alignment
Before printing a batch of checks, it’s crucial to verify the check alignment. To do this, print a sample check on blank paper. Ensure the information is correctly positioned within the check’s boundaries.
If any adjustments are needed, go to “Settings” and then “Print Checks.” Here, you can fine-tune the alignment settings until they match perfectly with your pre-printed checks.
Benefits of Printing Checks in QuickBooks Online
- Streamlines the check-writing process
- Reduces errors and ensures accuracy in financial transactions
Print Checks from Queue
Process Overview
To print checks from the queue in QuickBooks Online, first, ensure that you have added the checks to the print queue. Access the “Print Checks” option from the navigation menu to proceed with printing.
Printing Checks
- Click on the “Print Checks” option.
- Select the bank account for which you want to print the checks.
- Choose the specific range of checks you wish to print.
- Verify the alignment of the checks in the preview screen.
- Load blank check stock into your printer.
- Click on the “Print” button to initiate the printing process.
After initiating the printing process, QuickBooks Online will send the check information to your printer. Ensure that you have enough blank check stock loaded to complete the printing task successfully.
Tips for Efficiency
To streamline the process and avoid errors, double-check the alignment settings in QuickBooks Online before printing. Regularly update your printer drivers to prevent any compatibility issues during the printing process.
Troubleshoot Common Printing Issues

Check Alignment
Check the alignment of your checks in QuickBooks Online to ensure they are correctly positioned before printing. Misaligned checks can cause issues such as cutting off important information.
Printer Settings
Verify that your printer settings match the check paper you are using. Adjust the settings to ensure they are compatible with the size and layout of your checks.
Software Updates
Regularly update QuickBooks Online to the latest version to prevent printing errors due to outdated software. Software updates often include bug fixes related to printing functionalities.
Network Connection
Ensure a stable network connection when printing checks in QuickBooks Online. A weak or unstable network connection can lead to delays or partial page prints.
Test Print
Before printing multiple checks, always do a test print on regular paper to check for any issues with alignment or formatting. This helps prevent wasting check paper.
Closing Thoughts
In mastering how to write and print checks in QuickBooks Online, you’ve equipped yourself with essential skills for efficient financial management. By creating, recording, and printing checks seamlessly, you streamline your accounting processes and ensure accurate record-keeping. Setting up QuickBooks for printing checks and troubleshooting any issues that may arise further enhances your proficiency in managing transactions effectively.
Take charge of your financial tasks confidently by implementing the steps outlined. Simplify your check-writing process, avoid errors, and save time with QuickBooks Online. Embrace these practices to enhance your financial organization and keep your business running smoothly.
Frequently Asked Questions
How do I create and record checks in QuickBooks Online?
To create and record checks in QuickBooks Online, navigate to the “+ New” button, select “Check,” fill in the required details such as payee, amount, and account, then click “Save and close.”
How can I set up QuickBooks for printing checks?
To set up QuickBooks for printing checks, go to the Gear icon > Tools > Print Checks. Follow the on-screen instructions to link your printer, customize check settings, and align the checks properly.
What is the process to add checks to the print queue in QuickBooks Online?
Adding checks to the print queue involves selecting the checks you want to print from the list of transactions, verifying the details, and clicking on the “Add to Queue” option. This action prepares them for printing.
How do I print checks from the queue in QuickBooks Online?
To print checks from the queue in QuickBooks Online, go to the “+ New” button > Print Checks. Select the desired checks from the list, ensure your printer settings are correct, then hit “Print” to generate physical copies.
What are some common printing issues when printing checks in QuickBooks Online?
Common printing issues when printing checks may include misaligned text or amounts on checks, printer connectivity problems, or incorrect paper settings. Troubleshoot these by ensuring proper alignment, checking printer connections, and adjusting paper settings accordingly.

